Mastering the Art of Perfect Peanut Butter Blossoms: Your Guide to Soft, Chewy Bliss
There's a reason certain cookies hold a timeless spot in our hearts and on our holiday platters. Among them, the Peanut Butter Blossom reigns supreme – a delightful marriage of rich, tender peanut butter cookie and the iconic, melting chocolate kiss. If it's cookie week, the best peanut butter blossoms are undoubtedly on everyone's mind, promising a nostalgic trip with every soft, chewy bite. This comprehensive guide will walk you through crafting the ultimate version of this beloved classic, ensuring your cookies are nothing short of perfection.
Forget dry, crumbly impersonations. We're talking about a peanut butter blossom that boasts a perfectly tender center, a delightfully crackly edge, and that quintessential balance of sweet, salty, and chocolatey goodness. This isn't just a recipe; it's an invitation to create a cherished memory, whether you're filling a festive cookie tin, preparing for a party, or simply indulging a craving for pure, unadulterated comfort.
The Irresistible Allure of a Classic: Why Peanut Butter Blossoms Endure
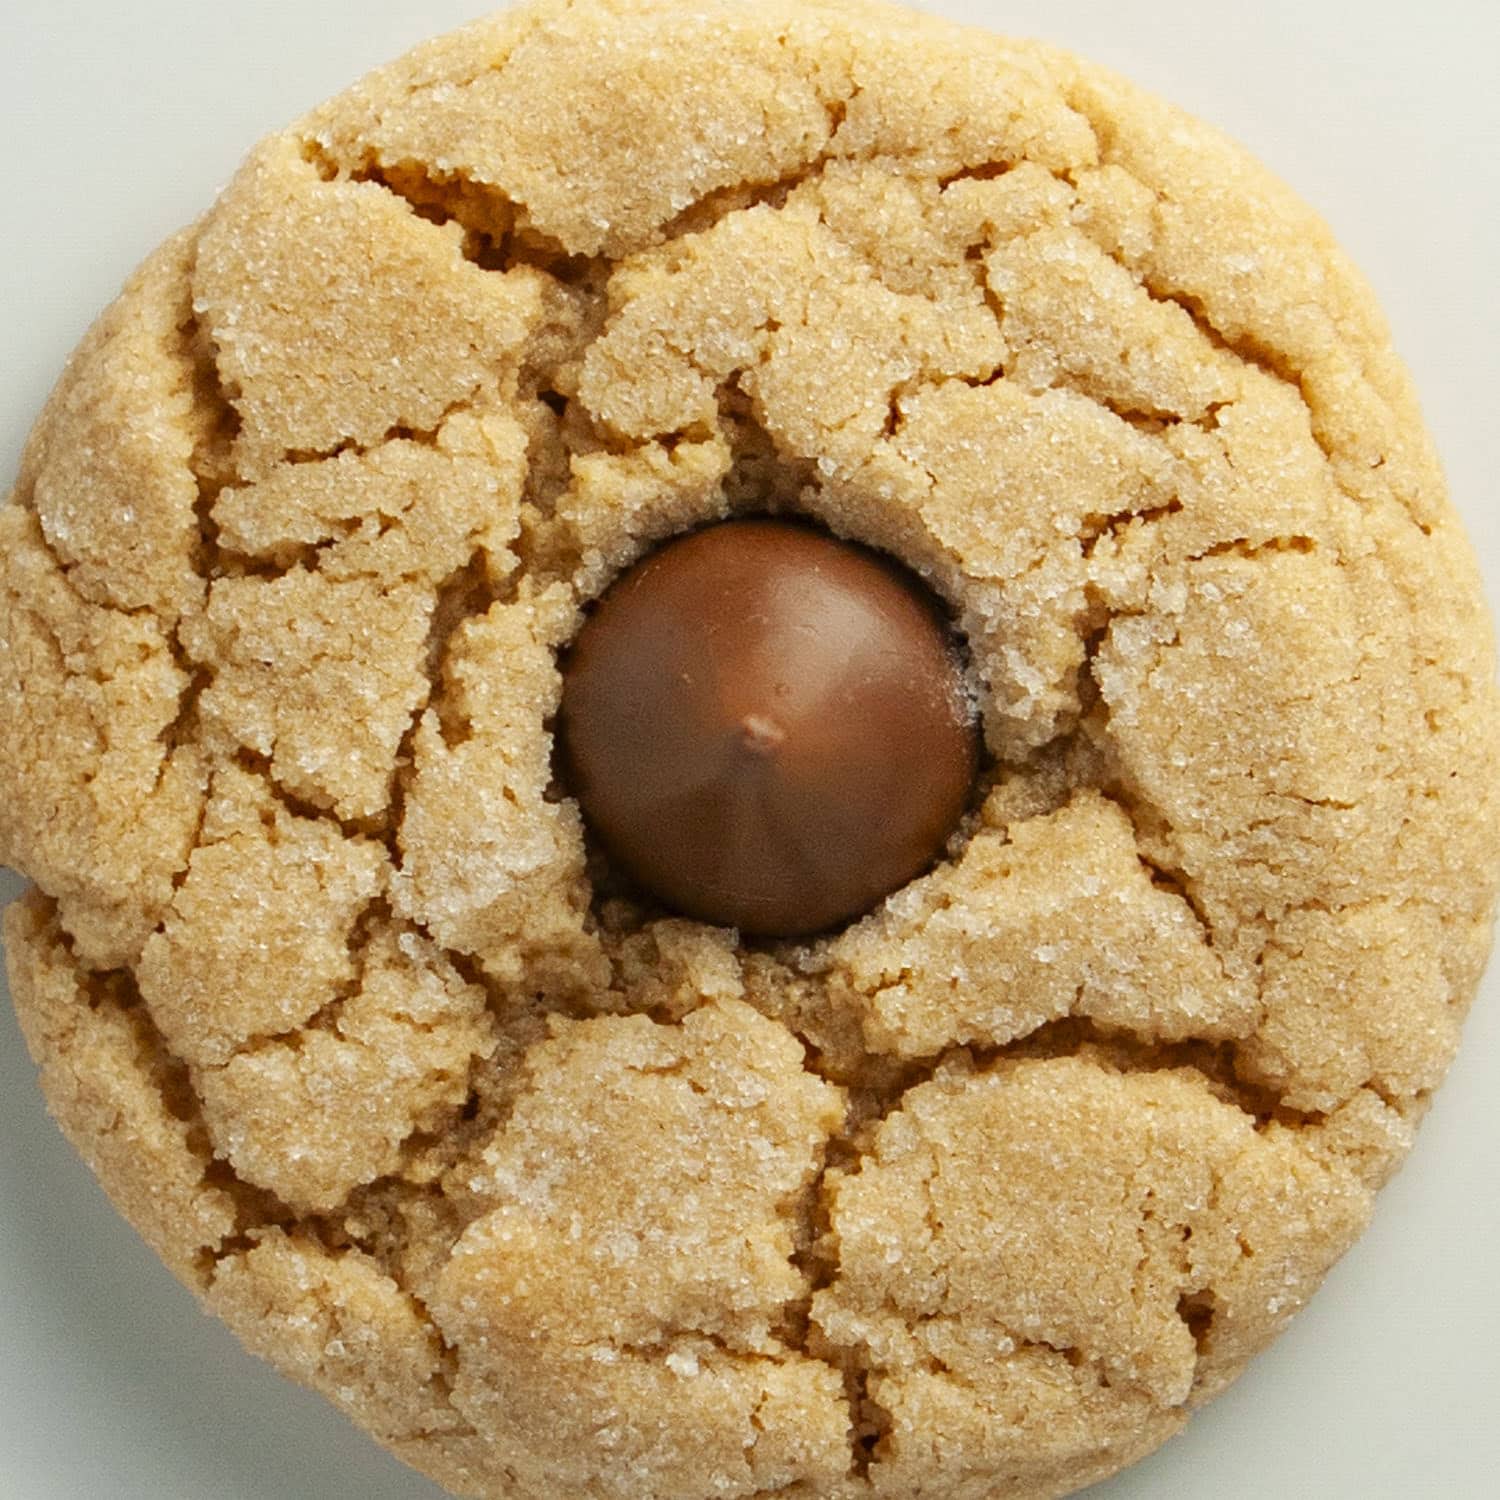
What makes the Peanut Butter Blossom such an enduring favorite? It’s a symphony of textures and flavors that captivate from the first glance to the last crumb. The vibrant golden hue, often adorned with a sparkling sugar coating, hints at the deliciousness within. Then comes the unmistakable crown – a Hershey's Kiss, pressed gently into the warm cookie, its base just slightly melted, creating that signature chocolate "blossom" effect.
Beyond aesthetics, the flavor profile is pure magic. The robust, nutty essence of peanut butter is beautifully complemented by the sweet, creamy chocolate. The texture is equally important: a soft, almost melt-in-your-mouth interior gives way to slightly chewy edges, all encased in that wonderful, subtly crisp sugary crust. It’s a cookie that feels both gourmet and homespun, sophisticated and utterly approachable. For many, it's a taste of childhood, a staple on every holiday cookie tray alongside Nostalgic Peanut Butter Blossoms: Your Essential Holiday Treat and other festive favorites.
Unlocking Perfection: Why This Recipe Delivers the Best Peanut Butter Blossoms
While many recipes exist, this guide focuses on a method proven to yield consistently perfect results. It’s the kind of recipe your family will ask for year after year, transforming your kitchen into a beacon of delicious aroma. Here’s why this approach stands out:
- Unmatched Texture: We prioritize that ideal balance of soft and chewy. The key is precise ingredient ratios and careful baking times that allow the cookies to set just enough without drying out.
- Flavors That Sing: This recipe amplifies the rich, nutty notes of peanut butter, ensuring it shines without being overwhelmed by sweetness. The chocolate kiss then provides the perfect counterpoint, making every bite harmonious.
- Simple, Reliable Steps: Using common pantry staples and clear, step-by-step instructions, this recipe is designed for bakers of all skill levels. It's truly a fool-proof method to create cookie week's best peanut butter blossoms.
- Nostalgia in Every Batch: There's an inherent comfort in these cookies. They evoke memories of family gatherings, festive occasions, and the simple joy of a homemade treat. This recipe captures that essence beautifully.
Essential Tips for Blossom Brilliance: Your Keys to Success
Achieving those picture-perfect, incredibly delicious peanut butter blossoms isn't just about the ingredients; it's about the technique. Here are the tried-and-true secrets that will elevate your baking from good to extraordinary:
- The Sugar Sparkle: Don't skip rolling your dough balls in granulated sugar before baking. This isn't just for looks; it creates that signature crackly, sugary coating that adds a delightful textural contrast and visual appeal. The sugar caramelizes slightly in the oven, enhancing the cookie's exterior.
- The Hershey's Kiss Moment: Timing is everything when it comes to the chocolate kiss. Press it into the center of each warm cookie immediately after they come out of the oven. The residual heat will soften the chocolate just enough for it to adhere beautifully and create that iconic slightly melted base without turning into a puddle. If you wait too long, the cookies will firm up, and the kisses won't stick properly.
- Beware of Overbaking: This is perhaps the most crucial tip for a soft, chewy cookie. Peanut butter blossoms should look slightly puffed and soft in the center when you pull them from the oven. They might even appear slightly underdone. Trust the process! Cookies continue to bake and firm up as they cool on the baking sheet. Overbaking leads to dry, crumbly cookies, so err on the side of caution.
- Room Temperature is Your Friend: Always use room-temperature butter and peanut butter. This ensures they cream together smoothly and evenly with the sugars, creating a uniform dough. Cold ingredients can lead to a lumpy batter and a less consistent cookie texture.
- Uniformity for Perfection: Use a small cookie scoop (about 1 tablespoon in size) to portion your dough. This guarantees that all your cookies are the same size, which means they'll bake evenly and look professional on a cookie tray. Uneven cookies will lead to some being overbaked while others are underbaked.
- Chill for Stability and Flavor: Refrigerating the dough for at least an hour is a vital step. Chilling solidifies the fats in the butter and peanut butter, preventing the cookies from spreading too much in the oven. It also allows the flavors to meld and deepen, resulting in a more robust and flavorful cookie.
Crafting Your Masterpiece: A Step-by-Step Journey
Ready to bake? Here's how to create about four dozen of the best peanut butter blossoms, perfect for any occasion:
- Prep Your Dry Ingredients: In a medium bowl, whisk together your flour, baking soda, and salt until they are thoroughly combined. This ensures even distribution of the leavening and seasoning throughout the dough.
- Cream the Fats and Sugars: In the bowl of a stand mixer fitted with the paddle attachment, combine your room-temperature butter, granulated sugar, and brown sugar. Beat on medium-high speed for about 3-5 minutes, until the mixture is pale, light, and fluffy. This aeration process is key to a tender cookie.
- Introduce the Peanut Butter and Wet Ingredients: Add your room-temperature peanut butter to the creamed mixture and continue beating for another minute until fluffy and fully incorporated. Scrape down the sides of the bowl. Then, add the egg and vanilla extract, beating until just combined. Be careful not to overmix at this stage.
- Combine Wet and Dry: With the mixer on low speed, gradually add the dry ingredients to the wet mixture. Mix only until just combined and no streaks of flour remain. Overmixing the dough can develop gluten, leading to a tougher cookie.
- Chill the Dough: Cover the dough with plastic wrap and refrigerate for at least 1 hour. This crucial step prevents excessive spreading during baking and enhances flavor.
- Prepare for Baking: Preheat your oven to 350°F (175°C) and position two racks in the upper and lower thirds of the oven. Lightly grease two baking sheets with nonstick spray or line them with parchment paper. Unwrap your chocolate kisses.
- Roll and Coat: Take half of the chilled dough. Using a 1-inch cookie scoop (about 1 tablespoon), roll the dough into even balls. Roll each ball generously in granulated sugar to coat completely. Place the sugared dough balls about 2 inches apart on the prepared baking sheets. Chill the remaining dough while the first batch bakes.
- Bake to Perfection: Bake for 10 to 11 minutes, rotating and switching the pans halfway through to ensure even baking. The cookies should look slightly puffed and lightly golden around the edges but still soft in the center.
- The Kiss Finale: As soon as the cookies come out of the oven, immediately press a chocolate kiss into the center of each warm cookie. Let the cookies cool on the baking sheets for about 10 minutes (allowing them to firm up) before carefully transferring them to wire racks to cool completely.
- Repeat: Repeat the rolling, baking, and kissing process with the remaining dough. This recipe yields about 4 dozen delicious cookies, making it ideal for sharing or stocking up! For more on batch baking, see our Easy Peanut Butter Blossom Recipe: Bake 4 Dozen Classic Cookies.
Storage, Freezing, and Creative Variations
Once you’ve mastered the best peanut butter blossoms, you'll want to know how to keep them fresh and perhaps even experiment with new twists.
Storage: Store your cooled peanut butter blossoms in an airtight container at room temperature for 4-5 days. If you plan to stack them, place a piece of parchment paper between layers to prevent the chocolate kisses from smudging or sticking together.
Freezing: These cookies are excellent for making ahead! You can freeze both the unbaked dough balls and the baked cookies.
- Dough Balls: Roll the dough into balls, coat in sugar, and place them on a baking sheet. Freeze until solid, then transfer to a freezer-safe bag or container for up to 3 months. Bake from frozen, adding a couple of minutes to the baking time, then add the kisses as usual.
- Baked Cookies: Once completely cooled and the kisses are firm, arrange baked cookies in a single layer on a baking sheet and freeze until solid. Transfer to an airtight freezer-safe container or bag, separating layers with parchment paper. Freeze for up to 3 months. Thaw at room temperature before serving.
Creative Variations: While the classic Hershey's Kiss is iconic, don't hesitate to get creative:
- Chocolate Choices: Experiment with Hershey's Hugs, dark chocolate kisses, mini Reese's peanut butter cups, or even a different shape of chocolate candy for a unique look.
- Peanut Butter Varieties: While creamy is traditional, a natural or even slightly crunchy peanut butter can add a different dimension. Just ensure it's well-mixed and at room temperature.
- Gourmet Touches: A sprinkle of flaky sea salt on top of the warm chocolate kiss enhances the flavor beautifully.
Your Ultimate Cookie Week Treat Awaits!
There’s a profound joy in baking, and few cookies encapsulate that joy quite like the Peanut Butter Blossom. With its comforting flavors, delightful textures, and classic appearance, it's a guaranteed crowd-pleaser for every season, not just the holidays. By following these expert tips and a reliable, step-by-step method, you are now equipped to master perfect peanut butter blossoms – soft, chewy, and utterly irresistible. So, get ready to preheat your oven, gather your ingredients, and experience the pure delight of baking what truly are the best peanut butter blossoms your kitchen has ever seen. Happy baking!
